Deploying a React Native Application to your iPhone
If you’ve created a React Native application and now want to put it on your iPhone so that you can use it yourself or show it off to all of…


If you’ve created a React Native application and now want to put it on your iPhone so that you can use it yourself or show it off to all of your friends, you will need to follow a few specific steps.

Note: I’m assuming that you already have Xcode installed, an AppleID, and your Signing Identities (Scroll to: Viewing Signing Identities and Provisioning Profiles) set up.
Step 1: Open your Project in Xcode
The iOS version of your app should live here:
ios > projectName.xcodeproj
If you’re in the Terminal you can use the following command:
open projectName.xcodeproj Step 2: Set up your app for deployment
- ⌘ + ⇧ + < (Product > Scheme > Edit Scheme)
- Change Build Configuration to Release
- Uncheck Debug executable
Step 3: Add icons to your app
- In the file directory on the left side of Xcode navigate to: yourProjectName > Images.xcassests
- Get a set of icons (I use http://appicon.build/ to do this)
- Drag and drop the images into the AppIcon window
Step 4: Connect your iPhone and Deploy
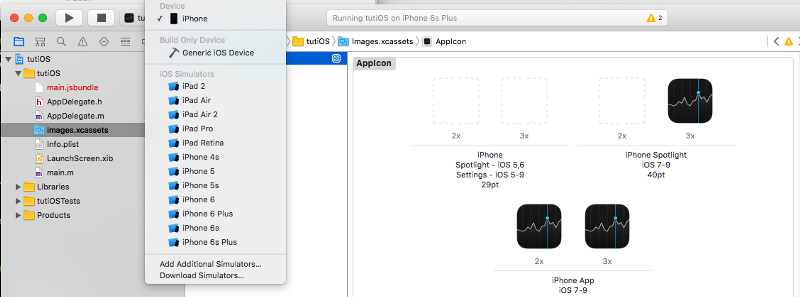
Select your iPhone and then click ▶.
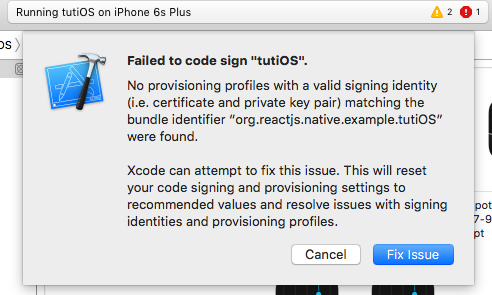
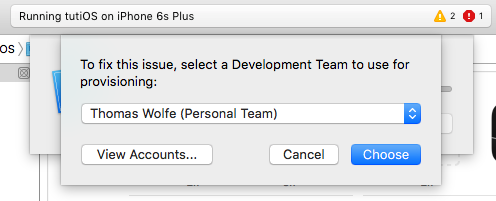
Note 1: you may get the following error and resolving it should be easy.
Note 2: In order to run the app on your iPhone you will need to do the following:
- Goto Settings > General > Profiles & Device Management
- Touch yourEmail@example.com
- Touch Trust “yourEmail@example.com”
You should now be able to run the application you build without having your iPhone connected to your computer.
Now, go use your app and show your friends how cool and easy it is to develop with React Native!